Blog

How to Fix Samsung Galaxy Flickering Screen Issues

Have you been struggling to use your Samsung Galaxy lately due to screen flickering issues? Not only is this type of problem worrisome, but it is also frustrating. 

If your phone’s screen has been flickering increasingly more, it is important that you get it fixed to prevent any more headaches and to ensure there is nothing seriously wrong with your device. 

Below, we will discuss some of the reasons why your phone may be flickering and how you can troubleshoot the issue. 

What Is a Flickering Samsung Galaxy Screen?

A flickering screen describes when your smartphone’s screen appears to glitch. There are several different ways in which it may manifest itself including:

  • Screen constantly blinks while you are using it 

  • Screen appears randomly with black and white lines 

  • Sections of the screen appear black or white 

  • Pixels blink in and out or fill the touchscreen 

Reasons and Solutions to a Flickering Samsung Galaxy Screen 

Typically, the main reason for a flickering screen is due to a hardware issue. The reason could be something is wrong with the LCD display to a crack in the screen. The problem may lie deeper within the phone as well. 

With that said, some screen flickering issues are related to software issues as well and some apps may cause this flickering issue to arise. 

If you are experiencing screen flickering, here are the steps you should take to try and fix the problem:

1. Check to see if your apps have any updates. 

Before you do anything, the first thing you want to do is check to see if any of the apps on your phone need an update. If you know which app is the problem app, even better, you can check directly to see if it needs to be updated. 

You will also want to check and see if there are any system updates that need to be installed at this time as well. 

2. Turn off any third-party apps. 

If you happen to have third-party apps installed on your phone, they could be the source of the issue. You will need to reboot your phone in safe mode. To do this: 

  • Turn off your phone 

  • Hold down the power button until you see the Samsung logo appear on the screen 

  • Remove your finger from the power button and hold the volume button until the phone reboots again 

3. Clear out the cache. 

You can attempt to clear out the cache in recovery mode. This fix will usually solve the problem as this method allows you to clear out any internal memory where the cache is stored. 

To clear the cache, you will need to: 

  • Turn your phone off 

  • Hold down the power button, home button, and the volume button at the same time until you see the Samsung logo appear 

  • When the recovery menu appears, you will want to scroll down to find wipe the cache partition and then click it 

  • Allow the phone to reboot and start up again 

4. Perform a hard reset of the phone. 

A hard reset should be your last resort as it will erase all the data from your phone. 

To perform a hard reset, you will need to: 

  • Boot up your phone in recovery mode 

  • Choose the factory reset option 

  • Confirm your choice and allow the phone to complete the process 

Let Our Samsung Galaxy Experts Help You 

Screen flickering issues can be a sign of a hardware issue with your phone, but they are sometimes related to software. The above steps should help you resolve any software issues that may be going on with your Samsung Galaxy. 

Should you continue to run into problems with your screen flickering, do not hesitate to reach out to NYC Cell Phone Repair. We are known locally for providing the best and most affordable Galaxy cell phone repair in NYC


Give us a call today to schedule an appointment or feel free to stop by our repair shop and drop your phone off to us.
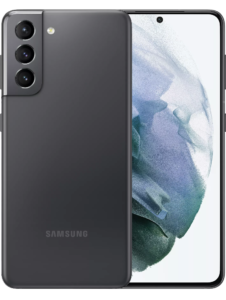
What to Do When You Drop Your Samsung S21 in Water

You have probably found yourself on this blog because you have unfortunately dropped your Samsung S21 in water. You may be wondering if you have lost all data on your phone and if you need to head out to purchase a new phone. 

Once your phone hits that water, your heart stops, and your world comes to a halt. You get nervous and start to panic as you instantly realize the potential of what could be. 

  • Is the motherboard damaged?

  • Will the screen work?

  • Did I lose all my data?

As these questions race through your mind, try to take a deep breath and know that not all phones that are dropped into water are completely ruined. 

Below, we will go over some tips and tricks to help you save your S21 after it has taken a bath. 

Saving Your Samsung S21 After a Dip in Water 

The FIRST and FASTEST thing you want to do is take your phone OUT OF THE WATER. Do not delay and do not hesitate – get it out of the water. 

Once your phone is out of the water, follow these steps: 

  • If your phone is not already off, turn it off. Do not turn the phone on. You will only do more harm if you choose to leave the phone on or turn it on.

  • Keep the phone in an upright position. This will allow the water to drain from the phone, cracks, and crevices.

  • Remove your SIM and SD cards from their slots. You want to make sure you do this carefully so as not to damage them or push water further into your device.

  • Dry your phone using a soft dry cloth or paper towel. You want to get your phone as dry as possible to prevent damage to it.

  • Place your phone in a safe and dry spot to dry out. You will need to allow it a minimum of 48 hours to dry. You do NOT want to turn it on during this time at all.

  • Once your device is fully dry and has sat for 48 hours, you can insert your SD and SIM card and turn the phone back on. 

AVOID Doing These Things to a Wet Phone At All Costs 

  • NEVER use heat to dry your phone. This means you should never use a hair dryer to dry it out. While some people recommend this, it will only further damage your phone as the heat can cause issues with the internal components of the phone.

  • Never blow into your phone, shake the phone, or swivel it around. This can allow existing water to fall deeper into the phone. 

NYC Cell Phone Repair Fixes Water-Damaged Phones

Water damage is not always a sure-fire sign that your phone is completely dead, and you need a new one. In fact, the experts at NYC Cell Phone Repair have experience repairing water-damaged phones with great success. 

Our team is ready to look over your water-damaged device and provide any necessary repairs to help restore it. Our phone repair shop in NYC is known for offering low prices and quick services. We know how important your phone is, which makes it important to us. 


If for some reason your phone cannot be repaired, we do offer data recovery services as well. Give us a call today to discuss your options or to schedule an appointment with our experts.

Common Android Phone Problems and How to Troubleshoot Them

Android is one of the most popular types of phones out there and the fan base is die hard. With beautiful pictures, enhanced video capabilities, and customizations that allow for a bunch of versatility, it is no wonder why Android tops the list as a fan favorite. 

While these phones are excellent, they do have common problems that they face, and some users run into these problems more frequently than others. 

While you can usually repair these common issues on your own, there are times when you may need to have your phone professionally repaired. 

Below, we will discuss some of the most common problems that you may face with an Android and how you can troubleshoot the issue at home. 

Common Issues with Android and How to Fix Them 

1. Fast Draining Battery 

One of the most commonly heard complaints from Android users is that their battery drains very fast. While the battery may be to blame, the issue is usually due to something else and can be corrected rather easily. 

To help you stop your Android battery from draining too quickly, try these things: 

  • Uninstall apps you do not use that eat up a lot of power 

  • Reduce the screen brightness 

  • Turn on battery-saving mode 

  • Turn off any unused or unnecessary features (i.e. Bluetooth, Wi-Fi)

2. Slowed Performance 

Nothing is more frustrating than a phone that operates so slowly that you could run around the block and come back to see nothing has changed. 

Over time, your device is likely to slow down due to you using up space by storing large amounts of data and installing multiple applications. 

To help stop this issue, you should: 

  • Clear your cache 

  • Remove any junk files 

  • Uninstall any apps that are unnecessary or unused 

3. Security Issues 

All devices are prone to experience a security threat, especially as you download items and explore the Internet. Security issues can be viruses, malware, and anything else that threatens or changes the way your phone operates. 

To protect yourself, you should: 

  • Install an anti-virus software on your phone 

  • Enable your device’s security features 

  • Never download suspicious apps or data 

  • Run an anti-virus scan periodically 

4. Apps Keep Crashing 

Another commonly talked about and experienced issue for Android users is that apps keep crashing either when they are opened or while they are being used. This can be quite annoying for anyone trying to use their device. 

To help stop your apps from crashing, you should: 

  • Force stop your apps 

  • Clear out the phone’s cache 

  • Uninstall the problem app and try to reinstall it again 

Turn to the Professionals for Help with Your Android Phone 

If you are experiencing any of the above problems with your Android phone and the above troubleshooting steps do not work, it may be time to have a professional look at your device. 


At NYC Cell Phone Repair, our experts have many years of experience providing the best and lowest cost cell phone repair in NYC. We can have your phone working properly quickly. Our team knows exactly what the issues are that Android users face and fixing them is our specialty. Feel free to call us today to schedule an appointment or stop by our repair center. 

How to Repair Cracked Back Glass on Your iPhone

If it has not happened to you, it has likely happened to someone you know – you drop your iPhone and pick it up only to find that the back glass is cracked. 

While the back glass does not affect the functionality of the front glass and you will still be able to use your phone, there are some other issues that the cracked glass can cause. For instance, if water were to get into the crack, it could cause issues with the logic board. In addition, it is likely that you will be unable to wirelessly charge your phone with a cracked back glass. 

When it comes to your iPhone, you want it to be in the best condition possible, and getting timely repairs can help ensure that it does remain in tip-top shape. Below, we will discuss how your iPhone’s back glass can be repaired once it is cracked. 

Can Cracked Back Glass Be Fixed?

If you have cracked the back glass on your iPhone, you may be wondering if it can be fixed or if it is something you will simply have to learn to deal with. 

Fortunately, in most cases, it can be fixed depending on the model of the iPhone you have. 

  • iPhone 14 and 14 Plus – These models come with removable glass, which means they can be repaired easily and are usually much cheaper than some of the other models

  • iPhone 14 Pro and 14 Pro Max – These models come with the back glass glued on, which requires professional repair

  • iPhone 12 and 13 – These models can have the back glass replaced but it needs to be done by an expert as the device will need to be opened up and some components taken apart to attach the new rear glass

  • iPhone 8, 11 series, X, and XR – These models have back glass that is connected to internal components, and replacing it can be tricky and should only be done by a professional 

Repairing an iPhone with Cracked Rear Glass 

When you discover that the back of your iPhone is cracked, you have a couple of options to deal with the issue at hand. Here are some of your options. 

DIY Replacement 

You can attempt to replace the rear glass on your iPhone yourself, but it may be best to have a professional do it. If you do choose to try a DIY replacement, you do run the risk of further damaging your phone. If you are confident you know what you are doing, you can try to replace the rear glass on your own. 

Add a Case 

If your iPhone is still working and the crack is small or not too noticeable, you may decide you want to wait to have it repaired. It is recommended that you put a case on your device to help prevent the cracks from getting bigger and spreading and to help prevent dirt or water from getting into the crack too. Even if you decide to add a case to your phone, you will eventually need to deal with the crack and have the glass replaced. 

Professional iPhone Rear Glass Replacement 

The best way to have your iPhone’s cracked rear glass replaced is to simply take it to a professional cell phone repair shop and have them replace it for you. This option is affordable, and they can usually replace the rear glass the same day. You will also know that the repair is being performed by a professional and there is less risk that something additional will go wrong with your phone during the replacement. 

Get a New Phone 

You could always get a new phone if you find that you are ready for an upgrade or if you have an older model of iPhone. 

We Offer Affordable Repairs for Your Cracked iPhone Rear Glass 

At NYC Cell Phone Repair, we provide you with fast and affordable repairs for your iPhone’s cracked rear glass. Our team is trained to replace the rear glass on any iPhone model, and we have the tools necessary to ensure the job is done properly. 

We have been named number one for iPhone repair in NYC and can’t wait to assist you in fixing your iPhone today. We do offer warranties with many of our repairs, and we keep the rear glass in stock so that you won’t be without your iPhone for long. 


Call us today to schedule an appointment to have your phone repaired or feel free to stop by our shop.

My iPhone Is Not Charging – One of These Reasons May Be Why

Oh no! So you discovered that your iPhone won’t charge, and you desperately need it for work and family communications. What do you do?

First and foremost, try not to panic. In most cases, an iPhone that won’t charge is not a serious problem and you may simply just be experiencing an issue with the battery or charging port. 

One of the reasons that the iPhone is so popular is because it has a good battery life and can last somewhere between 10 to 18 hours without needing to be charged. This means that most people do not have to charge their phones on a daily basis making it really convenient. 

However, there are instances where you may plug your phone in and find that it does not respond at all. Below, we will discuss some of the reasons why your iPhone may not be charging and what steps you should take next. 

Dirty or Damaged Charging Port 

If your iPhone is not charging, take a look at the charging port. This is the area where you plug in the cable to charge. If you notice any damage or dirt, this would be why you cannot achieve a charge on your phone. 

If the port is dirty or has something stuck in it, you can clean it out and attempt to charge your iPhone again. The best way to clean out this area is with a can of compressed air or a toothpick. You do not want to use a sharp object, as it can damage the port further. 

If the port is damaged, it will need to be replaced, and this should only be done by a professional who has inspected it first. 

Optimized Battery Charging Is in Use 

When your battery charges, if it tends to stop at 80 percent and not charge any higher than this, you probably have optimized battery charging turned on. It is important to note that this option uses location services and will only optimize the charging while you are at home. To stop this from happening, you need to go in and disable location services to achieve a full charge. 

System is Glitching 

It should come as no surprise that your iPhone may act up once and a while. It happens with all phones. Sometimes, when these glitches happen, you may not be able to charge your phone. 

The best way to try and fix this issue is to simply restart your iPhone and then attempt to charge it once again. 

Damaged Cable 

Naturally, when you notice that your iPhone is not charging, you assume it is a problem with the phone. However, this is not always the case. In fact, it could be due to a damaged cable. 

When your charging cable has become damaged or frayed, it can cause issues and your phone will not be able to charge. 

Do inspect your charger to ensure it is not damaged. If it is, replace it. You can also test to see if the issue is with the cable by using a different cable first and seeing if you can achieve a charge. If you can, the issue is with your cable. 

Let Our Team Inspect Your iPhone for Issues 

No matter what type of issue you experience with your iPhone, our team is here to help. Keeping your iPhone charged is crucial to being able to use the device when you need it. Any hiccup or issue with your charging port, phone, or cable can lead to issues with charging. 


When you face any type of charging issue, know that we offer professional iPhone repair in NYC. We are here to help you and can get your phone back on track when it comes to charging. We offer charging port repairs, battery replacement, and more. 

Phone Repair vs. Phone Replacement – Which One Should You Choose?

If you have recently noticed that your phone is broken or not working properly, you may be wondering if you should have it repaired or replaced. 

This is an important decision because, let’s face it, our phones are extremely important in our lives. They help us connect with friends and family, keep us on schedule, and allow us to work away from our desks. 

It is no surprise that phones are expensive and quite the investment, so when you notice that your investment has a cracked screen or another issue, it can be quite disheartening. 

Choosing whether to repair or replace your phone will depend on several factors and below, we will discuss some of these things to help you better choose which option fits your situation. 

Cost of Repair vs. Cost of Replacement 

In general, experts recommend that if your phone’s repair will cost more than half the cost of buying a new phone, you should opt for the new phone, especially if yours is several models older than the newest one. 

To understand whether repairing or replacing your phone is the better choice, it helps to know common pricing averages. For example, replacing a screen that is cracked will run you anywhere between $75 to $300. A new phone may cost you anywhere between $700 to $1,200 for the latest and newest iPhone or Android models. 

You can definitely save money by choosing to have your screen replaced over opting to purchase a new phone. 

Is Your Phone Outdated?

Most phones will last about 3 years and some longer if they are properly taken care of. If you have a phone that is older than 3 years, you may simply want to upgrade to a newer model, and purchasing a new phone would make the most sense over a repair. However, this is a personal decision. Should your phone, while older, still works well, you may find that repairing it makes more sense for you as opposed to worrying about transferring over all your data. 

Instances Where a Phone Repair Makes Sense Over Replacement 

  • Callers are unable to hear you 

  • Battery drains quickly 

  • No more storage space 

Instances Where a Phone Replacement Makes Sense Over Repair 

  • Current phone isn’t compatible with the latest operating system 

  • Phone randomly shuts off or reboots constantly

Where Should I Get My Phone Repaired?

Phone repairs are best done by experts who have training, knowledge, and experience in the industry. Phones are very finicky and they have many small components that can be easily damaged. 

At NYC Cell Phone Repair, we use only the highest-quality parts to make repairs to your phone. We also provide you with a warranty on most repairs and can complete many repairs on the same day right here in our NY repair center. 


We have been named number one as the best phone repair shop in NYC due to our low prices and outstanding customer service. If you are trying to determine whether you should repair or replace your phone, don’t hesitate to reach out to our team. We are here to help!

Fixing Samsung Galaxy S23 Plus and Ultra Camera Issues

Your Samsung S23 camera is an important part of your phone. It allows you to capture memories right before your eyes and in amazing quality too. However, if you have attempted to use the camera on your S23 Plus or Ultra and have noticed that it keeps crashing, you may be worried, frustrated, and unsure of what to do next. 

One of the most common issues on cell phones is that the camera crashes. While this likely does not help you feel any better, at least you know you are not alone. 

There are several reasons why your camera app may be crashing and most of the issues are related to the software, so it is generally considered to be an easy fix that you can do right at home. However, if your camera does not respond to the software fixes, then it could be an issue with the system itself. 

Below, we will review some of the steps you can take to correct camera issues with your Samsung Galaxy S23 Plus or Ultra. 

Perform a Forced Restart 

One of the first solutions you want to try is a force restart. Why? It is the simplest, easiest, and requires less involvement. You will find that a force restart works most of the time. 

Force restarting your device will cause all apps that are running in the background to shut down and refresh your device’s memory. 

To perform a forced restart, you should follow these steps: 

  • Close any open or recent apps that are currently running on your device 

  • Press down the power and volume button at the same time and hold them down until your device turns off and restarts itself 

  • When you see the Samsung logo appear on the screen, release both buttons 

  • Allow the phone to reboot and then attempt to use the camera again 

Reset the Camera 

If the data and/or cache of the camera is corrupt, it will cause functionality issues and cause the camera to crash. If the above solution does not work, this would be your next go-to. 

To reset the camera, follow these steps: 

  • Pull down the app bar to expose it 

  • Click on the camera and hold it until you see an options menu pop up 

  • Click on app info 

  • Select storage 

  • Click on clear cache 

  • Confirm your choice to clear the data 

Get Professional Cell Phone Repairs 

One of the most important things to remember when you are facing an issue with your Samsung S23 Plus or Ultra is to not panic. If neither of the above solutions works, it is possible that there is an issue with your phone itself. 

At NYC Cell Phone Repair, we offer affordable and fast camera repairs. We have been named number one for offering the best Galaxy cell phone repair in NYC. Our team will quickly diagnose any issues with your camera and get it working again. 


Call us today to schedule an appointment!

How to Back Up Your Cell Phone Data Just in Case

If you were to drop and break your phone right now, would you have a way to access the data on it, if the phone was no longer functioning?

If not, then you may want to consider backing up your cell phone data just in case anything does happen. It will help you stress less, especially when you do accidentally drop your phone or find that it will not turn on. 

Backing up your phone data is not too difficult of a process and can be done from the comfort of your home in a few steps. 

Below, we will review the steps you should take to get your Android phone’s data backed up today! 

Photos and Videos 

We know how important photos and videos are. They say a picture is worth a thousand words and these photos and videos help you capture memories for a lifetime. 

Backing up your photos is pretty simple, but you will need an app that allows you to store media. One helpful app is Photobucket. 

To backup your photos: 

  • Download the app of your choice and then open it up 

  • Create an account on the app 

  • On your phone, click MenuSettingsUpload Settings 

  • You will then follow the instructions to turn on the backup feature to save all your photos and videos into the app 

If you do not have an upload settings option on your phone, you can navigate through the app in a similar way and choose to auto backup your photos and videos. 

Data 

You are able to back up the data from your phone onto your computer via a USB cable. 

To do this: 

  • Connect your phone to the USB cable and then plug the cable into your computer 

  • Open up the file explorer 

  • Locate your phone and double click on it 

  • Locate your data files and open them up one by one 

  • Transfer the data over to your computer 

Since this is a manual process and not automatic, you will periodically need to do this to ensure that all recent data is backed up to your computer. 

Call Logs and Texts 

Keeping a record of your call logs and texts can be quite important. Backing them up can help you keep the information you need if your phone does stop working properly. 

You will need an app that will allow you to back up this data. 

To start the process: 

  • Download the app 

  • Open the app and follow the instructions to sign up and get started 

  • Allow permissions as necessary 

  • Select backup and wait for the data to backup 

  • Determine where you would like the data to be stored and how often to perform a backup 

  • Select backup now 

You can also back up your call logs and texts through Google Drive. 

To do this: 

  • Go to Settings on your phone 

  • Tap on Google 

  • Select Backup 

  • Click Back up now 

Back Up Your Phone’s Data Today to Keep it Safe 

You can follow any of the steps above to back up your phone’s data. One method that is likely the easiest is to simply upload and back up everything into a Google Drive. This can all be done rather quickly and effortlessly on your end. 


If you are in need of data recovery or data backup services, the experts at NYC Cell Phone Repair are here to help. We have many years of experience in the industry and have been named number one for cell phone repair in NYC. Call us today to schedule an appointment or feel free to bring your device by our repair shop. 

Signs That You Need LCD Repair for Your iPad or iPhone

Your iPad or iPhone is likely a huge part of your life. Most people who own these devices use them very often to perform activities within their life from communicating with friends and family to conducting work activities. The screen on your device plays a vital role in making this possible and without the screen, you would not be able to do any of these things. 

iPad and iPhone screens can quickly experience damage to the LCD screen, especially if the device is dropped. There are many issues that can cause your screen to malfunction and leave you worried that your device is toast. 

Below, we will discuss some of the signs that the LCD screen on your iPad or iPhone is damaged and is in need of repair. 

Screen Is Black 

If your iPad or iPhone screen is black and will not turn on at all, this is an indication that there may be something wrong with the LCD. This rings true if you have recently dropped the phone on the ground or in water. 

The reason behind the screen going black is that impact on the iPhone or iPad can cause the LCD cable to become disconnected or break altogether. 

Screen Has Dark Spots 

If you start to notice dark patches or spots on your device, this means that the LCD is in trouble. You may even notice that the screen is discolored in some spots. Failure to have the LCD repaired will lead to the touchscreen not functioning at all anymore. 

Screen Has Poor Color 

iPhones and iPads are known for being vivid in their colors and display, so if you notice that your screen has poor color quality, it is probably an issue with your LCD display. If the dullness is not able to be improved by adjusting the color balance or brightening your screen, you will likely need to have the LCD replaced. 

Screen Flickers 

A flickering screen is an indication that your device’s LCD is damaged and will need to be replaced. The flickering can appear in a number of ways and may actually flicker in and out or the screen may shake when you use the device. Continued use of a device with a flickering screen can lead to the device’s screen becoming completely unresponsive to touch. 

Other Common Signs That LCD Repair Is Needed 

  • Touch function is malfunctioning or not working at all 

  • Slow device 

  • Cracks in the screen 

Professional LCD Repair in NYC Can Help 

LCD problems demand quick attention and quick repairs to prevent serious problems from arising with the iPad or iPhone. Ignoring a damaged LCD is never a good idea and can lead to your device’s screen not working at all. 

NYC Cell Phone Repair offers some of the best and lowest cost iPhone repair in NYC. We can replace your iPhone or iPad LCD screen right here on-site. We complete most repairs the same day and our screen repairs come with a warranty. 


Bring your device to us today or give our team a call now to schedule a repair appointment.

Troubleshoot Why Bluetooth Isn’t Working on Your Google Pixel

Bluetooth is a helpful function on your phone as it allows you to use hands-free devices and connect to other devices. But, when Bluetooth does not work, you cannot do any of those things. Not only is it a frustrating problem to face, but it can also be quite an annoyance too. 

Before you start to panic and think you need to replace your investment, our team is here to provide you with some tips to help you get your Pixel back on track and connected to Bluetooth once again. Check out our troubleshooting advice below. 

Is Your Bluetooth Turned On?

While it may seem redundant to even ask this, it is possible that your Bluetooth option is simply turned off. Even if you had it on previously, it could get turned off and lead to connectivity issues. 

To check and see if your Pixel Bluetooth option is on, head over to Settings and then click on the Connected Devices option. From there, click on Connection Preferences and then Bluetooth. Check to see if Bluetooth is on. If it is not, turn it on. 

If your Bluetooth is already on, tap to turn it off, and then tap again to turn it back on. This simple “reset” can help the Pixel reconnect to Bluetooth. 

Is Your Device Near Your Phone?

Bluetooth cannot connect if it cannot locate a device nearby. The term nearby can be quite subjective, so while you may think the device is close enough, your phone may not register it. 

You should place your device right next to your phone to allow the two to pair via Bluetooth. 

Have You Tried to Reconnect the Device?

If you continue to have issues with Bluetooth connection, disconnect your device from Bluetooth and then connect it again. 

To do this, swipe to access the Quick Settings. Make sure Bluetooth is turned on then press and hold the Bluetooth logo. Click on the name of the device that you would like to pair. If you find the device is connected, tap to disconnect it. Click Connect again. 

Once you have reconnected the device, attempt to use it and see if it works. 

Have You Tried a Different Bluetooth Device?

The problem could be an issue with the actual device that you want to pair to the phone. Try connecting and using a different device to your Bluetooth. If the test device works, then the issue lies with the initial device you were trying to connect to. 

Have You Tried to Reset the Device or Network?

Resetting your network can sometimes remedy the issue and get your device connected. To do this, go to Settings and click on the System option. Click Reset Options and then click on the option that states to Reset Bluetooth

Another option is to simply restart your phone. 

Get Professional Google Pixel Repair in NYC 

If you continue to struggle with getting your Bluetooth to work, you may be in need of Google Pixel repair services. At NYC Cell Phone Repair, we have experience fixing all types of Google Pixel models and can get your Bluetooth working properly again. 


Give our team a call today to schedule an appointment with us or feel free to stop by our repair center to drop your phone off.

Contact Us